
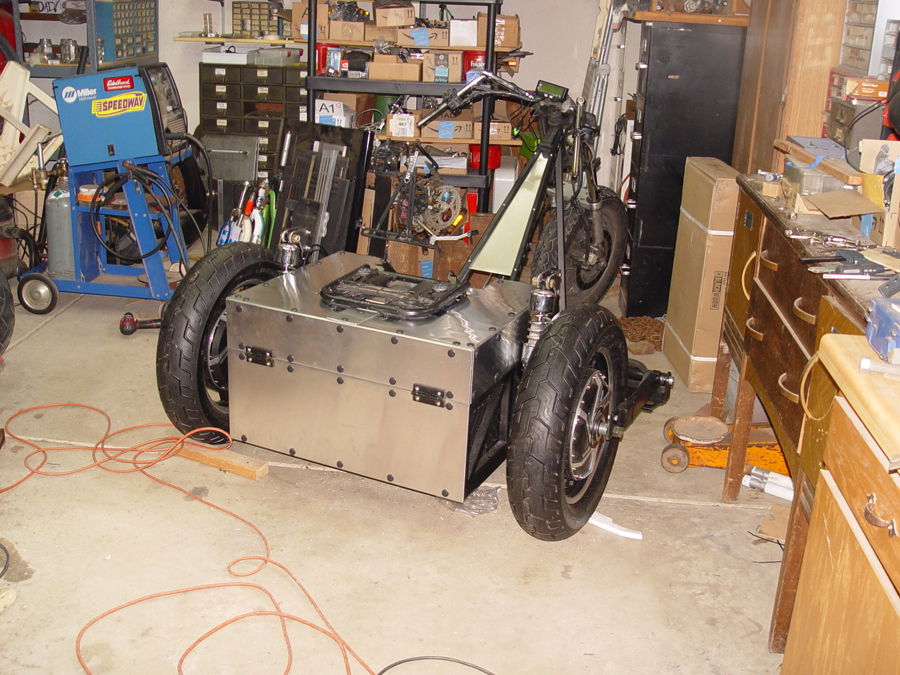
My goal for this project is to build a commuter vehicle capable of highway speeds (60 mph), a reasonable range (25 miles) and a budget that won’t require a second mortgage ($5K).
I have chosen to use a three wheeled trike design for the following reasons:
a) I am familiar with it from prior builds.
b) It is relatively light weight.
c) It is more stable (for me at age 72) than a two wheel “motorcycle”.
d) It is easier to license here in CA as a motorcycle than if it were a hand-built four wheel vehicle which would require licensing as a car.
e) although the trike will be “open air” I am fortunate to live in California’s Central Valley where year-round motorcycle riding is quite common.
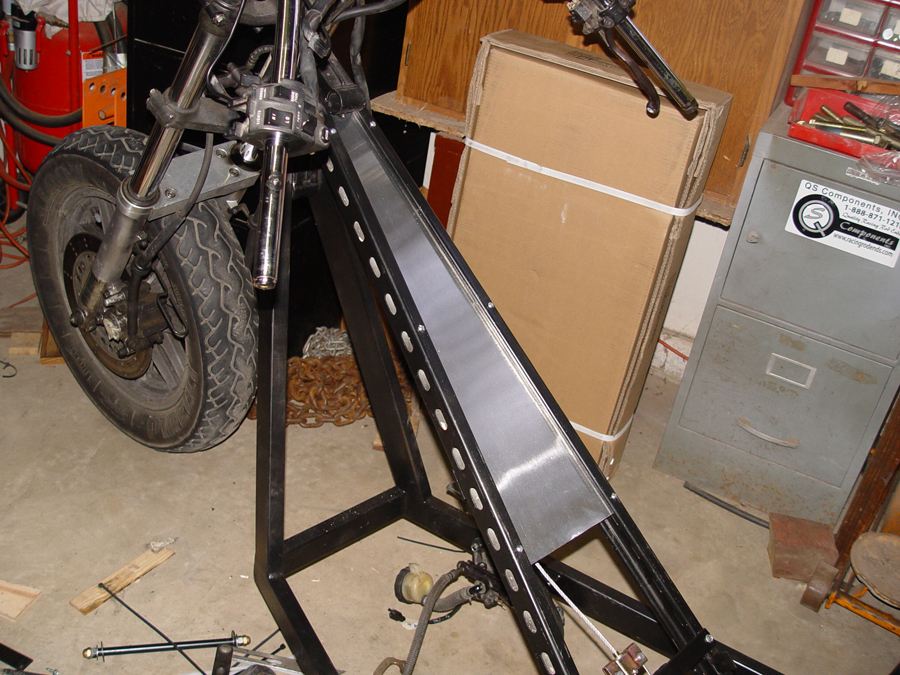
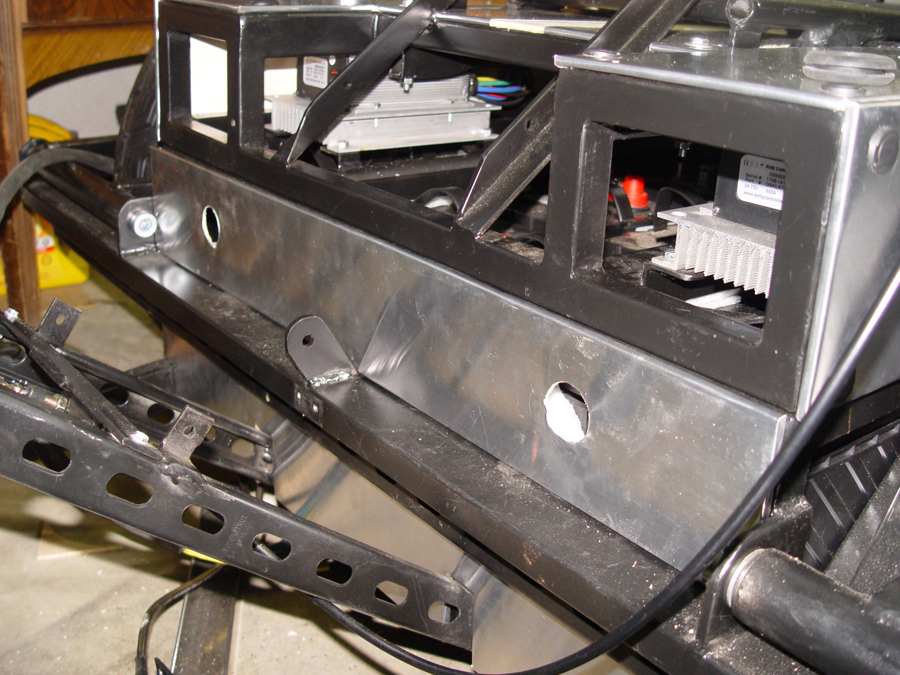
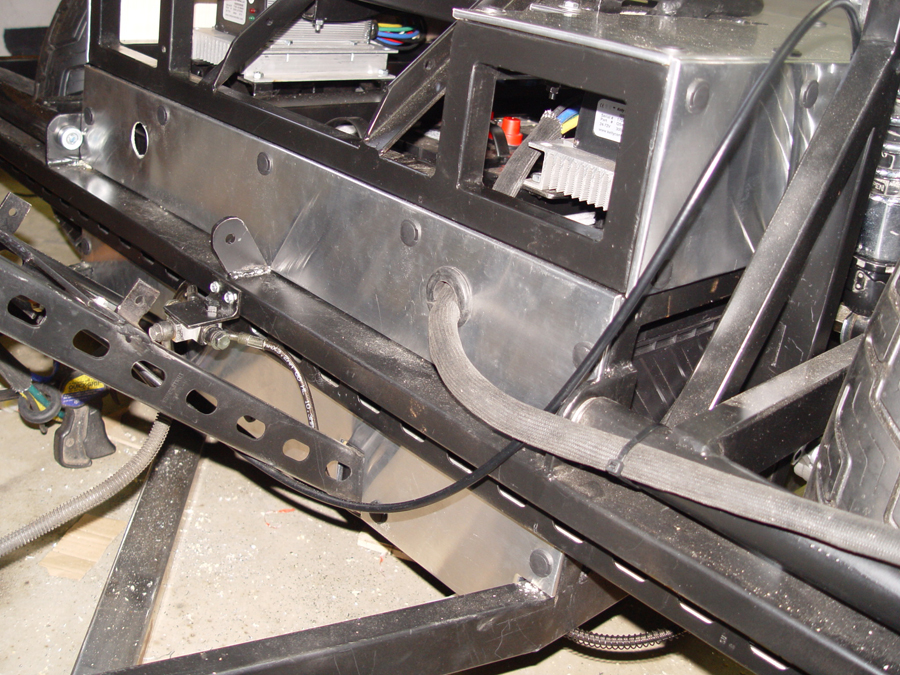
The trike will be built using two 3000W, QS Motors hub wheels mounted on the rear. The hubs have 16" rims, 273 ring size, 40H magnet size and are dual shaft, requiring drop outs on each side of each wheel. The other major electronic components include:
*Two Kelly controllers model KLS7230S (includes regeneration, electronic reverse, and cruise control)
*Two controller heat sinks
*Cycle Analyst V3 instrument cluster
*Dunlop Motorcycle tires (150/80/16)
*Kelly 400A72V contactor
*Holdwell ED250B-1 emergency shut off
*Hydraulic disc brakes on both rear wheels
*Dual disc hydraulic brakes on front wheel
*Mechanical parking/emergency brake kit
*6 - 12 volt EverStart 29DC deep cycle lead acid battery pack rated at 125 amphour.
*4 awg welding cable for all main battery wiring.
I will be posting my progress to this thread as well as a somewhat more detailed version on my own site,https://hotrodjalopy.com/ . Once on the site just click on the Electric Chopper Trike button to navigate to that build. You can follow the build and ask questions or make comments from either place.
I have chosen to use a three wheeled trike design for the following reasons:
a) I am familiar with it from prior builds.
b) It is relatively light weight.
c) It is more stable (for me at age 72) than a two wheel “motorcycle”.
d) It is easier to license here in CA as a motorcycle than if it were a hand-built four wheel vehicle which would require licensing as a car.
e) although the trike will be “open air” I am fortunate to live in California’s Central Valley where year-round motorcycle riding is quite common.
The trike will be built using two 3000W, QS Motors hub wheels mounted on the rear. The hubs have 16" rims, 273 ring size, 40H magnet size and are dual shaft, requiring drop outs on each side of each wheel. The other major electronic components include:
*Two Kelly controllers model KLS7230S (includes regeneration, electronic reverse, and cruise control)
*Two controller heat sinks
*Cycle Analyst V3 instrument cluster
*Dunlop Motorcycle tires (150/80/16)
*Kelly 400A72V contactor
*Holdwell ED250B-1 emergency shut off
*Hydraulic disc brakes on both rear wheels
*Dual disc hydraulic brakes on front wheel
*Mechanical parking/emergency brake kit
*6 - 12 volt EverStart 29DC deep cycle lead acid battery pack rated at 125 amphour.
*4 awg welding cable for all main battery wiring.
I will be posting my progress to this thread as well as a somewhat more detailed version on my own site,https://hotrodjalopy.com/ . Once on the site just click on the Electric Chopper Trike button to navigate to that build. You can follow the build and ask questions or make comments from either place.


")


