Go Back  

DIY Electric Car Forums > EV Conversions and Builds > Batteries and Charging

Register Blogs FAQ Members List Social Groups Calendar Search Today's Posts Mark Forums Read

Reply
 
Thread Tools Display Modes
  #1  
Old 09-22-2009, 03:17 AM
SimonRafferty SimonRafferty is offline
Senior Member
 
Join Date: Apr 2009
Location: Horsham UK
Posts: 246
SimonRafferty is on a distinguished road
Default $200 Build your own intelligent charger.

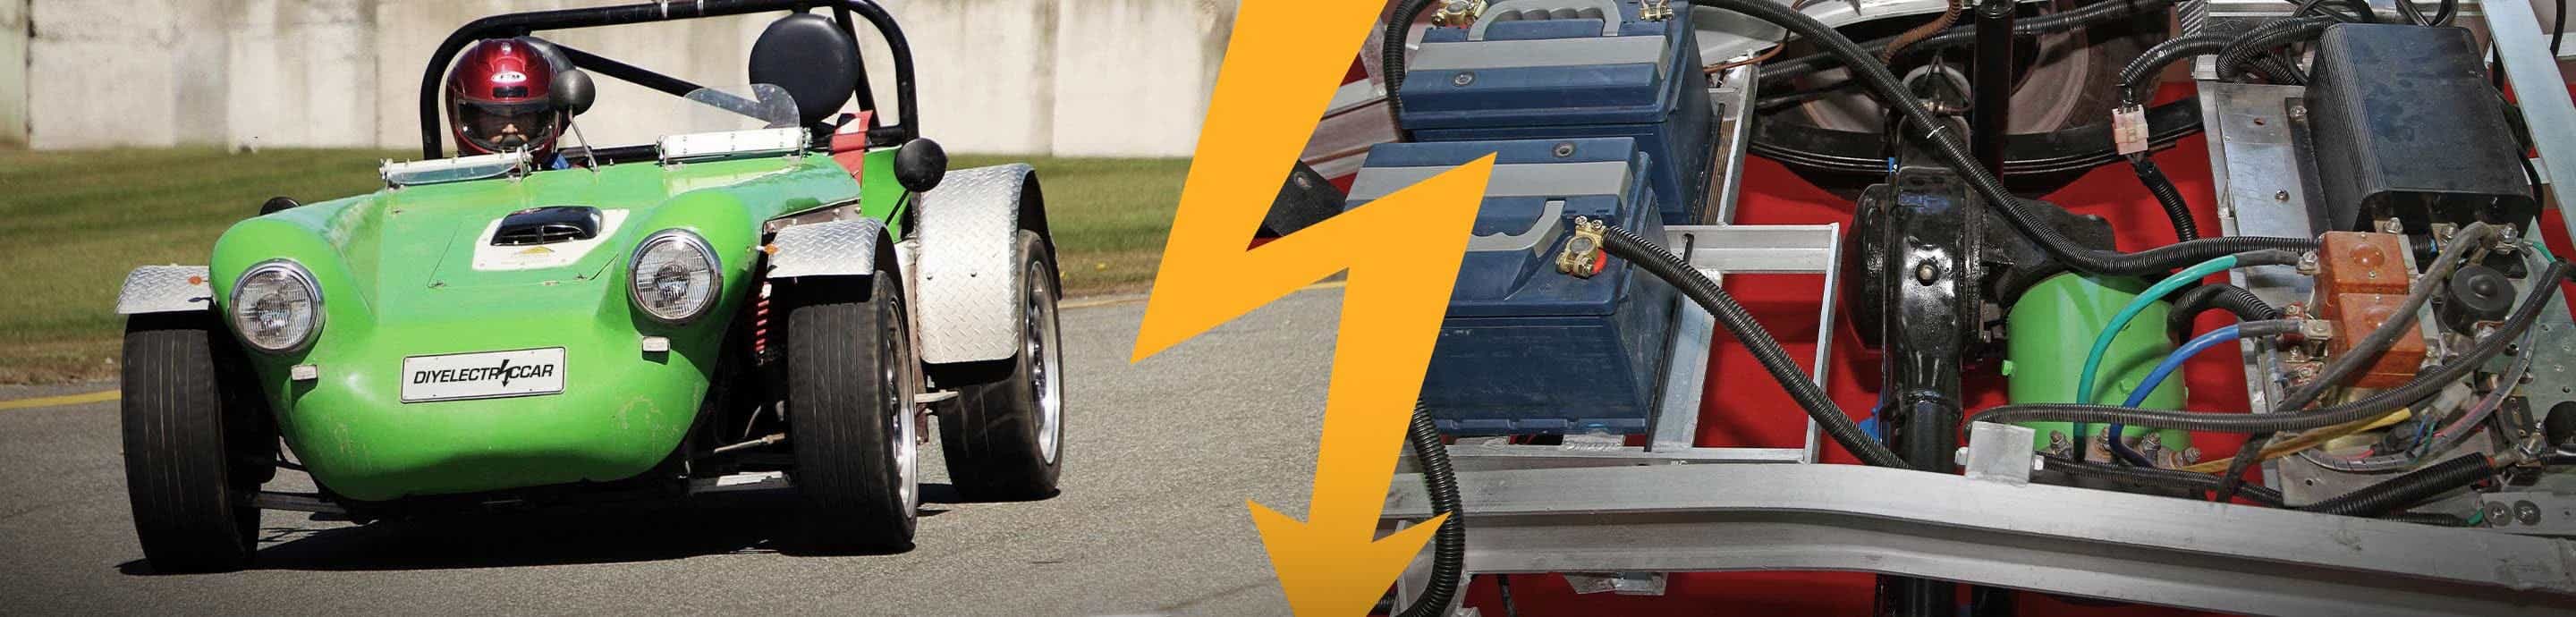
This project started here. I had built a high voltage electric vehicle but found the options for charging somewhat limited and very expensive. I wondered how complicated it could possibly be? A couple of minor explosions and the odd electric shock later, here it is - a fully programmable digital charger capable of operating up to 350v and 35A.

I built mine largely from parts salvaged from junk computer UPS's but even if you bought all the parts new, I doubt it would come to much more than $200.

First of all the circuit diagram:


I would strongly recommend you test and tun this using an isolating transformer. While testing, I used and isolating transformer as well a Variac which allowed me to reduce the input voltage to a relatively safe 50v or so.

This is a list of the parts you will probably need to buy. I've not included most of the resistors and capacitors - but they are shown on the circuit above:
High Side Driver - A3120
Encapsulated 12v Power Supply
15v DC/DC Converter (this could do with being higher power than 3W)
5v Zenner Diodes used to protect microcontroller
40A Bridge Rectifier Avoid the Chinese ones from eBay - they say 35A but let the smoke out at about 15A.
Ultra Fast Diodes I'm using 5 salvaged 10A Shottky diodes, but they are no longer available. Something like the ones listed will be fine though. Parallel up enough for 2 x the max charge current.
Microcontroller This is the most expensive part at about $60

Parts you are best off salvaging from something else:
Large Electrolytic Capacitor. Must be rated at >= 2 x your mains input voltage or it will explode (exciting and smelly). I have a 2200uF 500v capacitor - but something a lot smaller will be fine - it's just what I had.

IGBT I've used a big 200A 600v IGBT from a 3 phase UPS - but it only needs to be rated at about double your charge current. There are some nice ones on eBay for about $25 - but you can just parallel up a load of low current ones on a heatsink. Watch out though - often the metal tab on the device is connected to one of the pins. This may cause a problem for other stuff connected to the heatsink - particularly your fingers!

Output smoothing Capacitor I used something similar to this but it's not that critical. It's to get rid of the switching spikes from the output so any low value high voltage (non electrolytic) capacitor will probably do.

It's not shown in the circuit, but I also put a power diode in series with the connection to the batteries. This is just in case the batteries are connected the wrong way round. In this case you will get a loud pop and the smoke will escape.

Relay The microcontroller board includes a relay which it says is rated at 15A. However - it kills itself at a lot less than that. I'm using it to switch a larger 60A relay in the output line (RL1 on the diagram).

Shunt The current is measured using a simple 0.22 Ohm shunt. I would recommend one of these over a wire-wound type as they have very low inductance and can be bolted directly to a heat sink. This particular one is rated at 50W or 14A but bigger are available.

I built mine on stripboard just to try it out - but may get some PCB's made.

Next, I'll cover the software and microcontroller.
Attached Images
File Type: jpg Board.jpg (39.0 KB, 326 views)
File Type: jpg In Car.jpg (31.0 KB, 258 views)
File Type: jpg In the box 1.jpg (41.6 KB, 252 views)
File Type: jpg LCD 1.jpg (18.3 KB, 228 views)
File Type: jpg uC.jpg (29.7 KB, 236 views)
File Type: jpg Charger Circuit 1.2.jpg (77.0 KB, 3482 views)

Last edited by SimonRafferty; 09-23-2009 at 04:17 AM.
Reply With Quote
Sponsored Links
  #2  
Old 09-22-2009, 04:22 AM
SimonRafferty SimonRafferty is offline
Senior Member
 
Join Date: Apr 2009
Location: Horsham UK
Posts: 246
SimonRafferty is on a distinguished road
Default Re: $200 Build your own intelligent charger.

Microcontroller and Software
The project is based on an AT Mega 128 development board which includes a relay, a beeper, a 2 line 16 character LCD (sadly not backlit) and five buttons. It also has several digital and analogue ports brought out on to connectors on the rear.

The microcontrollers themselves are inexpensive, but you need to spend about the same again on a programmer. It is a 'dongle' which connects to the USB port on your PC and to one of the sockets on the back of the controller (the JTAG port in my case).

You also need a language to program it in / with. To make it as widely understandable as possible, I adopted a version of Basic - MikroBasic
I started with the demo version - and found I quite liked it. Because of the size of the program, I bought the 'pro' version which was about $150 - but I will get more use out of it than just this I hope.

That means that unless you can persuade someone else to do it for you, you are looking at another $200 to burn the software on to the microcontroller board.

Once the software has stabilised, I might offer some kind of "send me your board and I'll blow the software on to it for a nominal consideration" type thing - which will lower the cost a bit.

I have attached the code for the charger. This version works but has a few 'issues'. Most are cosmetic (screens not being very clear or UI being poor) but the main one is that the charge cycle times out after about 20 mins - so you only get 20 min charging at a time.

I have also uploaded the .HEX file which you can burn directly on to the controller using a piece of free software

How the application works
There are three main functions:
1. Calibrate
From the home screen, push the left button. It will ask you to measure the battery voltage with a meter and adjust the reading on the screen (using the top and bottom buttons) to match. This just calibrates it's internal volt meter.
To exit to the home screen push the middle button (this works from most of the other screens too - sort of like the back button)

2. Edit
From the home screen, push the Bottom button. Edits the charge profile.
The charge profile consists of five 'Pots' (Why 'Pots' - cos it's short and each pot contains info?). Each represents one charging stage.
within each pot, you can set:
Enable - Enables this pot. If your profile only needs 2 pots, disable the other 3.

Voltage - Sets the max voltage

Current - Sets the max current
The output will try to achieve the specified voltage, unless the current is too high - then it will limit the current. Remember, this is the voltage of the whole string, not a battery or cell.

Trans Voltage - this is a voltage which when reached, this pot will terminate and the next enabled pot start. Set higher than the charge voltage to ignore this parameter (as it will never be reached)

Trans Current - If the charge current drops below this value the pot will terminate and the next enabled pot begin. Set to zero for it to be ignored.

Timeout - the time in seconds (up to 2550s) after which the pot will terminate

You use the top and bottom keys to increase and decrease values, the left and right keys to cycle through the parameters and the middle button to save and exit back to the home screen.

3. Run
From the home screen, push the right button. Runs the charge profile. The duty cucle starts at 1 and climbs slowly until the desired voltage or current is reached - then increases and deacreases to keep it within the desired limits. It will hover around +/- a couple of volts because of the limited PWM resolution but this should be OK for the batteries, it's better than 1% regulation.

4. Test
From the home screen, push the Top button. This was added to test the circuit without necessarily charging a battery. I just conected the output to a light bulb as a load. You can use the top and bottom buttons to adjust the duty cycle from 1 to 255. The display shows the measured current and voltage.


I forgot to mention that I had abandoned using a hall effect current probe in favour of a shunt.
The hall effect probe, for a number of reasons worked better than the shunt but unfortunately I stepped on the only one I had and broke it. In it's place I have used a 0.25 ohm 100W resistor which will drop 5v at 20A - and give me good resolution across this range. I will probably go back to the hall effect sensor at a later date when another suitable one falls in to my hands. This is the type I used previously.
Attached Files
File Type: pdf Charger Code.pdf (26.7 KB, 281 views)
File Type: zip CHARGER Hex.zip (14.7 KB, 91 views)

Last edited by SimonRafferty; 09-22-2009 at 05:22 AM.
Reply With Quote
  #3  
Old 09-22-2009, 04:31 AM
Tesseract's Avatar
Tesseract Tesseract is offline
Senior Member
 
Join Date: Sep 2008
Location: Tampa, FL USA
Posts: 2,149
Tesseract will become famous soon enough
Default Re: $200 Build your own intelligent charger.

Interesting effort, Simon... but your circuit... well... let's just say it's missing a bunch of stuff.

1. WHERE'S THE FUSE, SIMON??? I don't see any surge protection, either. If the IGBT fails it will fail short circuit, and if your battery pack has just enough impedance to not vaporize the IGBT's bondwires, welll...

2. inrush current limiting, aka "precharge" - this is probably why you blew up one of the electrolytics. You need to put, say, a 100 ohm/5W resistor in series with the cap that gets shorted out by a relay after a second. This will make the bridge rectifier a lot happier, too.

3. proper isolation of the control circuit from the mains - while I think it is arguably pointless to isolate the mains from the battery pack, referencing the microcontroller interface to the mains is a real no-no. Lots of stuff needs to be changed to fix this issue, but start with your current sensing and gate driver.

4. current sensing - I really recommend you go back to a Hall effect sensor both because it is naturally isolated AND likely more accurate in this situation. The reason has to do with the reactance of the stray inductance in the sense resistor approaching or even exceeding the actual resistance value, which exaggerates the output voltage as the frequency goes up.

5. buck inductor - the core material and number of turns of the inductor should be specified with a bit more care. I like to use this site:

http://schmidt-walter.eit.h-da.de/sm...bw_smps_e.html

to get a reasonably accurate initial estimate of the component values needed.

Now, please edit that circuit before someone here with even less knowledge/experience builds it with even less suitable components and destroys their battery pack, burns down their car/garage/house/whatever.
__________________
Chief Electron Herder for Evnetics, LLC.

Shameless Plug: Every EV'er should subscribe to ChargedEVs Magazine
Reply With Quote
  #4  
Old 09-22-2009, 04:51 AM
jackbauer's Avatar
jackbauer jackbauer is offline
Senior Member
 
Join Date: Jan 2008
Location: Ireland
Posts: 1,215
jackbauer is on a distinguished road
Default Re: $200 Build your own intelligent charger.

Well done. I'm looking at something like this myself but am thinking of a more traditional 50hz transformer based design.
Reply With Quote
  #5  
Old 09-22-2009, 04:57 AM
SimonRafferty SimonRafferty is offline
Senior Member
 
Join Date: Apr 2009
Location: Horsham UK
Posts: 246
SimonRafferty is on a distinguished road
Default Re: $200 Build your own intelligent charger.

Quote:
with even less knowledge/experience
That's a little bit hostile - don't you think?

OK - I missed out the fuses, and the bleed resistors. I'll update it in a minute.

Isolation from the mains. The IGBT driver is opto isolated from the microconroller. The current and voltage sensing is more difficult. One option I considered was to use an A to D board with an optical data link to the main board. Do you have a constructive alternative suggestion?

http://schmidt-walter.eit.h-da.de/sm...bw_smps_e.html - the site you suggested is very good. Wish I'd seen it previously.
To use this, the only bit you cannot work out for yourself is frequency - and it's about 41kHz. For my application it suggests 500uH inductance with 2.5mm wire. The inductance I'm using is a bit bigger than that - but it seems to work OK.

Is this really any more dangerous than using a bridge rectifier and a kettle element or capacitor as a current limiter as a battery charger? However, Tesseract's response to the thread on that one was:
Quote:
Good luck, and don't forget your safety glasses with this one
I'm obviously missing something.

I agree in general with your points - but the point of this was to make something low cost which is better than a kettle element! It's not supposed to be competing with multi thousand dollar chargers - so treated with the same caution you would extend to a kettle element current limiter, it should not be a problem.

Si

Last edited by SimonRafferty; 09-22-2009 at 07:10 AM.
Reply With Quote
  #6  
Old 09-22-2009, 08:30 AM
neanderthal neanderthal is offline
Senior Member
 
Join Date: Jul 2008
Posts: 126
neanderthal is on a distinguished road
Default Re: $200 Build your own intelligent charger.

This is a fantastic idea. I am anxious to watch it's evolution.
Reply With Quote
  #7  
Old 09-22-2009, 12:53 PM
SimonRafferty SimonRafferty is offline
Senior Member
 
Join Date: Apr 2009
Location: Horsham UK
Posts: 246
SimonRafferty is on a distinguished road
Default Re: $200 Build your own intelligent charger.

Good news! It all seems to work rather well.

I built a charge profile from the info here and have achieved a 20% increase in range compared to charging the batteries withg a variac.

I'm charging at a constant current (8.5A) until the batteries get to 2.45v per cell (Bulk Charge). Then switch to constant voltage (limited to 2A) at 2.45v for a period of 4 hours (Absorption Charge). Then switch to a 2.27v per cell float charge which times out after 4 hours.

I've also fixed several of the bugs in the software and improved the voltage measurement calibration to within 1%

Si
Reply With Quote
  #8  
Old 09-22-2009, 12:59 PM
jackbauer's Avatar
jackbauer jackbauer is offline
Senior Member
 
Join Date: Jan 2008
Location: Ireland
Posts: 1,215
jackbauer is on a distinguished road
Default Re: $200 Build your own intelligent charger.

Very interested in this as it looks like I too will be using odyssey batts. What ah capacity are you using and how long to recharge?
Reply With Quote
  #9  
Old 09-22-2009, 01:28 PM
SimonRafferty SimonRafferty is offline
Senior Member
 
Join Date: Apr 2009
Location: Horsham UK
Posts: 246
SimonRafferty is on a distinguished road
Default Re: $200 Build your own intelligent charger.

Mine are 50Ah (15 of them). The bulk charge depends on the degree of discharge but assuming they are completely flat, it should take about 6 hours plus 4 hours Absorption.

This was with the Optimas from the junk yard. Before I fit the Odysseys, I want to build something to limit each battery to 14.7v allowing them to auto equalise.

Si
Reply With Quote
  #10  
Old 09-22-2009, 02:07 PM
jackbauer's Avatar
jackbauer jackbauer is offline
Senior Member
 
Join Date: Jan 2008
Location: Ireland
Posts: 1,215
jackbauer is on a distinguished road
Default Re: $200 Build your own intelligent charger.

Yeah i've been brainstorming on that also as the odysseys don't like going above 14.7v per batt and i'm worried that a "dumb" pack charger would cause damage even if the total voltage were limited. Its a tough ball of wax because even if you detect one bat at 14.7v others probably are not.
Reply With Quote
Sponsored Links
Reply

Share or Bookmark this

Thread Tools
Display Modes

Posting Rules
You may not post new threads
You may not post replies
You may not post attachments
You may not edit your posts

BB code is On
Smilies are On
[IMG] code is On
HTML code is Off

Forum Jump


All times are GMT -6. The time now is 10:02 PM.


Powered by vBulletin® Version 3.8.7
Copyright ©2000 - 2012, vBulletin Solutions, Inc.
Copyright 2009 Green Web Publishing LLC
Ad Management by RedTyger