
Here we go again! And I blame DIYEC for this one! Okay, so I bought the project car all by myself, but someone must have mentioned the possibility of using the Lexus hybrid for a donor. So next thing you know, I have a Lexus GS450H at my door. Straight from Salvage Heaven. Better than Salvage Hell, because this thing ran and drove and performed!! I totally lucked out. 2007 with 184K miles and it runs so sweet! Just a bit crunched in the rear.
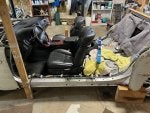
I have been driving it around our rural area (salvage title in hand) and it moves! Today I got it on the lift for the first time and checked a few dimensions that tell me I can fit the whole hybrid drive train in my 1950 Plymouth. We'll see. The bailout option is to just use the electric motors per the Damon video and toss the ICE. But, (cringing at Remy's potential comments) my hot rod bias for 340 HP is pulling me toward the hybrid mix. The Lexus weighs in at 4,134 lb. The Plymouth 3,072 lb. I don't think the difference of 1,062 lb will be offset by the battery pack vs. cast iron engine and tranny.
This one will take longer than the Volvo. That was light duty with small car and small parts. But it was an excellent way to learn EV systems, thanks to you guys, and like I told my wife and friends, "How could I waste all that knowledge I gained?" Yeah. We'll see...
![]()
![]()
![]()
I have been driving it around our rural area (salvage title in hand) and it moves! Today I got it on the lift for the first time and checked a few dimensions that tell me I can fit the whole hybrid drive train in my 1950 Plymouth. We'll see. The bailout option is to just use the electric motors per the Damon video and toss the ICE. But, (cringing at Remy's potential comments) my hot rod bias for 340 HP is pulling me toward the hybrid mix. The Lexus weighs in at 4,134 lb. The Plymouth 3,072 lb. I don't think the difference of 1,062 lb will be offset by the battery pack vs. cast iron engine and tranny.
This one will take longer than the Volvo. That was light duty with small car and small parts. But it was an excellent way to learn EV systems, thanks to you guys, and like I told my wife and friends, "How could I waste all that knowledge I gained?" Yeah. We'll see...


") 😁
😁


